
Energy Freedom
It’s great fun being mobile and exploring our wonderful country and waters by RV or boat there’s nothing better than being “off the grid” generating and using power from the sun. It’s a sense of real freedom to power whatever you need, wherever you go. Here is a comprehensive guide to Off-grid power.
For many, off-grid seems complex with so many components, so much electrical jargon and it’s sometimes difficult to get the right advice when your not talking to a specialist in their field.
Rest assured at AA Solar you are talking to experts with more than 30 years experience specifying and installing Solar on RV’s, Campervans, Caravans and Boats
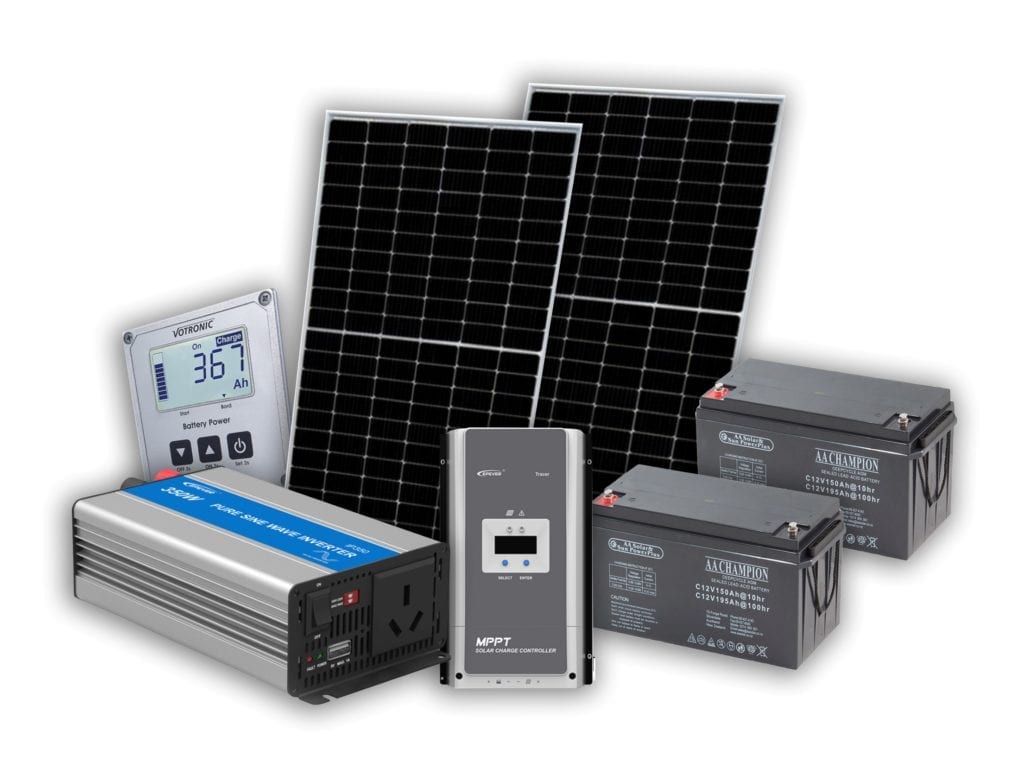
Components Guide For Off-Grid Power For Your Campervan or boat.
- Solar Panel(s) – To generate DC (Direct Current) electricity from sunlight
- Solar Panel Controller(s) – to take the DC from the panel(s) and charge your battery bank.
- Battery Bank (1 or more batteries) – to store DC electricity.
- Battery Monitor – To monitor your battery usage and remaining capacity.
- Inverter -To convert DC battery power to AC power for small devices and loads.
12 or 24 Volt Off-Grid Power Solar Systems.
Voltage
If your vehicle is a 12V vehicle and your DC devices such as your compressor fridge, lights and TV are 12V – then you will most likely install a 12V solar system.
If you have a truck or bus that is 24V and you want to run larger inverters requiring 24V to deliver enough power, you should implement a 24V system.
For most RV’s, campers and boats, a 12V system is most popular.

Calculating Your Electrical Load.
The best place to start is to add up all of your electrical loads to size the battery bank and solar to suit. This Power formula is handy.
POWER (WATTS)= VOLTAGE X AMPS
E.g.
- LED Lights = 20W/12V = 1.6A x 5 hours per night = 8AH
- Compressor Fridge/Freezer avg= 20W/12V=1.6A x12 hrs per nigh=19.2AH
- Water pump=20W/12V =1.6A x 1hr per day = 1.6AH
- TV = 45W/12V = 3.75A x 5 hrs per night = 18.75AH
Total Amp Hours consumers overnight = 47.55AH or rounded up to 50AH
By understanding the full load and the likely usage of each device, you can design a system that will give you the right amount of capacity and power.
Selecting The Correct Components
With every component in a solar system, there are many options with varying specifications, features and even lifespan.
1. Battery Type and Size.
The battery needs to big enough to run your devices and be recharged in full by your solar panels. In an RV or boar solar system, AGM and Lithium deep cycle batteries are the most popular.
2. Solar Panel Type and Size.
The main consideration with panels is obviously their physical size, weight and what you can fit where on your roof to maximise your potential solar generation. We offer 50W to 410W.
3. Solar Controller Type and Size.
The Solar Controllers convert DC power voltages and solar panels into appropriate battery charging voltages. Batteries of different types require different charging regimes.
4. Inverters Type and Size
To power AC loads, an inverter can be installed to convert 12V DC or 24V DC to 230V AC. The most important consideration when choosing an inverter is to ensure that your battery bank will support the load.
Electrical Protection and Safety.
When installing a solar system, electrical protection is essential to safeguard people and equipment from large currents; where an overload, equipment failure, short circuit or random electrical disaster can occur.
One weak link in a system could render the entire system unsafe, be it an incorrect fuse, an inadequate cable or the incorrect connection of loads and earthing protection.
We recommend you discuss with us your electrical protection needs we can give expert and experienced advice.

Installation and Putting It All Together.
You have a couple of options when considering the installation options.
- Install yourself.
- We can install it for you.
Whichever option is right for you, you will have access to our experienced team with more than 10,000 installations over the last 30-years. We have the combined talents of designers, electricians, and technicians.
If you are installing your self, keep in mind the installation of solar equipment involves:
- Working at heights
- Handling heavy panels, while on the roof of your vehicle
- Install heavy batteries (often upside down or tricky spots)
- Operating metal cutting equipment
- Thought and skill to ensure equipment is accessible and looks professionally installed.
- Electrical Sign-Off by a Master Electrician
Getting us to take care of the installation it will be done safely, look great and generally completed within a day. All work is supervised and signed off by a Master Electrician.
Guide to Off-Grid Power – Your Next Steps
We would love to assist you. With more than 10,000 Successful installations over 30 years, you can be assured that you can trust our team.
Enquiry
In-depth Product Guide to Off-Grid Power For Motorhomes, Caravans or Boat
Looking for more? Below is a more in-depth guide to Off-Grid Power for Motorhomes, Caravans and Boats.
Battery Type and Size
To get the system sizing right, you want a battery big enough to run your devices (discharge amount) and enough solar power to recharge them back to full.
If you don’t have enough solar power to recharge your battery, it will eventually run down, and you will damage it – no matter how big the battery.
Every battery type has a different capacity and lifespan. The Lifespan is measured in Cycles. In an RV or boat solar system, AGM and Lithium deep cycle batteries are the most popular.
3 Golden rules when it comes to mixing batteries:
- You cannot mix and match batteries of different types as the controllers only support one kind of battery, and you cannot mix and match charge voltages and charging methods.
- You should never add new batteries to a bank of old batteries because the old batteries will bring down the new batteries. E.g., you cannot charge above the level that the old, degraded batteries will accept, therefore shortening the life of your new batteries that will never get fully charged, and they won’t last.
- You cannot add any more than 3 x 12V batteries in a string on any controller as they won’t support any more. 6 x 6V connected in series that appear to the controller as three 12V strings are the maximum for 6V cells.
AGM Batteries
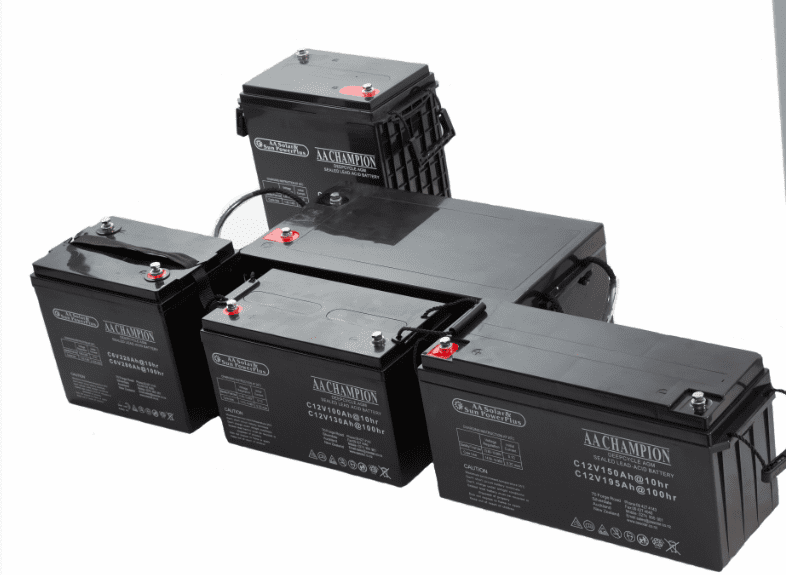
An AGM battery is a fully sealed battery that can be mounted in any orientation and will reliably give you 5-10 years of exemplary service if you treat them well. When we say “treat them well” – There’s a trade-off between cycles vs discharge levels. If you discharge an AGM battery by 20% of its full capacity, it should last 5-10 years. If you discharge it to 50% of its maximum capacity, it could last two years or less.
To size an AGM battery bank where we have 50AH per 24 hours from our battery and only discharging your AGM battery by 20% DOD (Depth of Discharge). To get the maximum lifespan, you would need 250AH (50AH x 5) of the total battery capacity or a MINIMUM of 1 x 260AH battery or 2 x 130AH batteries in parallel.
We say MINIMUM because the sizing is based upon an average load and does not account for peak loads or times when you cannot get full regeneration from your solar panels due to lousy weather or shading.
As a rule of thumb, calculate your MINIMUM as above and then DOUBLE IT, so in this case, we would advise and recommend 2 x 260AH batteries to provide enough headroom for peak loads, bad weather, shading and temperature.
A battery can also lose half of its capacity when extremely cold.
“I thought a 100AH battery would do the trick” – is often what we hear 😊
Lithium Batteries
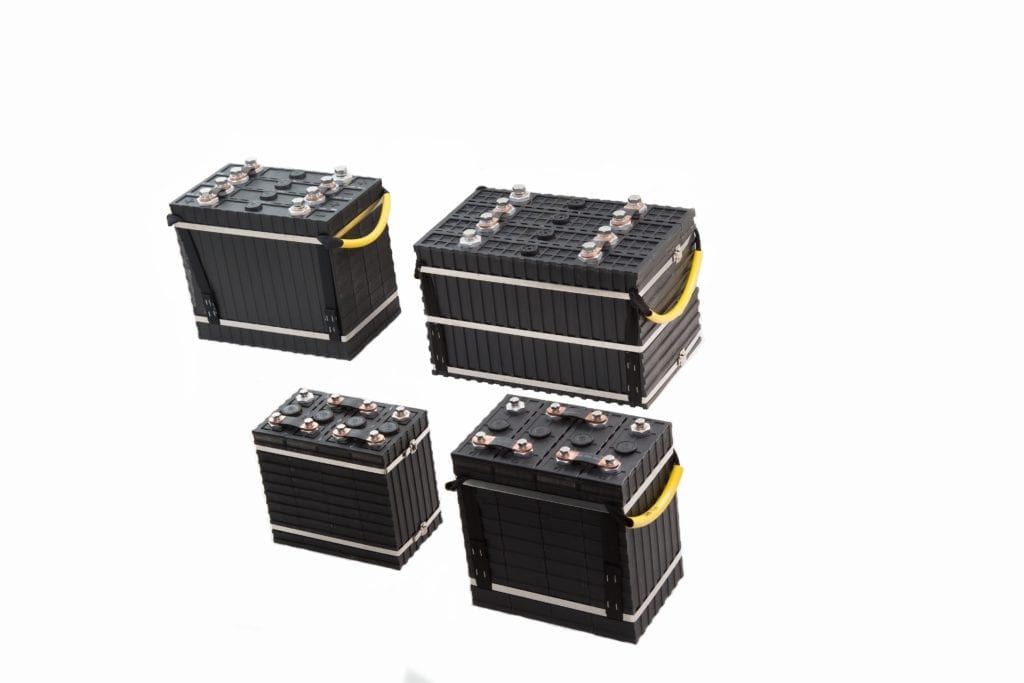
Lithium batteries are gaining popularity as they have become more economical. The main advantage is their depth of discharge and their long lifespan. They are also smaller and lighter.
You can safely discharge a Lithium battery by 80% of its capacity or 80% DOD. Depending on the Manufacturer, they guarantee 3,000-6,000 cycles; which means a lifespan of 10 or more years.
Being smaller and lighter, a single 100AH battery would give you 80AH of usable power vs 2 x 200AH AGM batteries which would also provide 80AH but would weigh three times more and last half as long.
Often – we talk about the value vs price. Lithium do provide greater economics over the long term, eg. 10 years or more.
If you see yourself in the same vehicle for 10 years or more, lithium is more economical as otherwise you will run through two sets of AGM over the same time period.
Modern lithium batteries are a plug and play replacement for most systems as they have inbuilt BMS (Battery Management Systems) – some that even have a smartphone app. These days – good solar controllers either support lithium or can be user programmed to the correct bulk charge they require with little effort when swapping to Lithium.
Mounting Batteries
AGM & Lithium batteries can be mounted in any orientation, eg. Standing up, on their side or even upside down. These batteries are heavy items and dangerous goods which need to be very securely mounted.
We typically use aluminum L-channel cut and screwed to the floor to contain these batteries which can also be strapped down for extra protection.
Battery Monitors
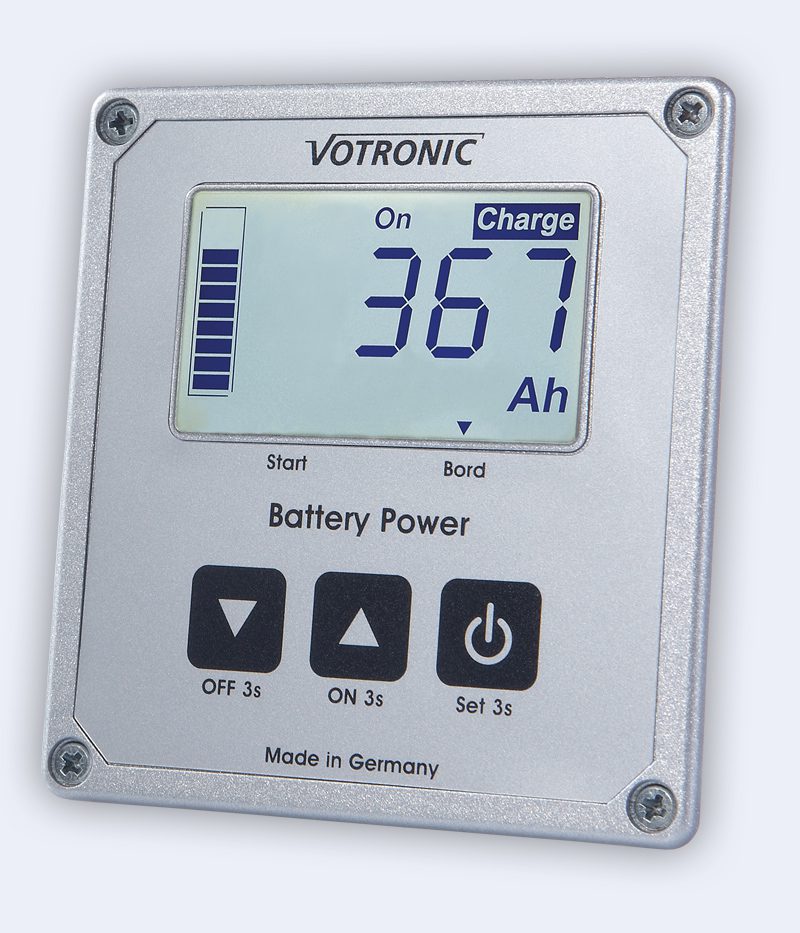
A battery monitor is a small, computerised device that monitors not just the voltage of your battery bank(s) but measures the amount of current coming in (solar charge) and out (your electrical load). These monitors are programmed with the amount of battery capacity connected and once calibrated; they will give you an accurate real-time estimate of your remaining capacity as a percentage or bar graph. Eg, if your batteries are discharged 10% the monitor will show 90% capacity.
Most monitors will measure the voltages of your start battery and house battery but will only compute the capacity of the house bank.
Another feature of a battery monitor is their ability to disconnect the DC loads when your battery bank reaches a pre-programmed discharged amount.
For example, you can set the monitor to disconnect the load at 30% depth of discharge and with an additional solenoid relay module (sold separately) it will physically disconnect the battery to protect it from further discharge. We offer 5-year warranties on our AGM battery range when used with a battery monitor. Without a battery monitor we can only offer a standard 2-year warranty.
Sizing and Choosing Solar Panels
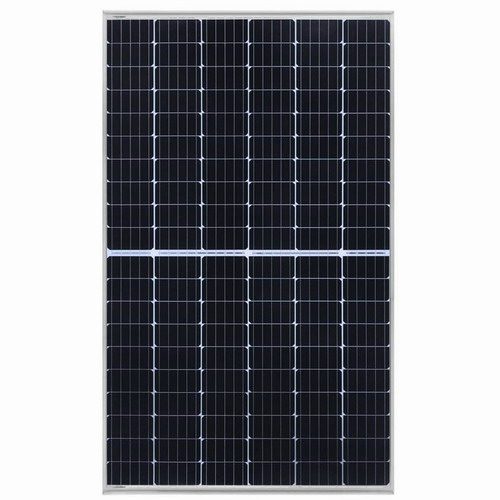
We offer a range of solar panels from 50W to 410W.
Like a roof will replenish a water tank with rainwater – to replenish a battery which has been used, a solar panel provides an off-grid source of DC power to recharge the system to 100% during the day when sunlight can generate DC power from your panels.
Solar Panel power output is measured in Watts which is their operating Voltage x Amps they can produce.
A 220W panel for example has an operating voltage of 19.8V x 11.11A = 219.97W.
To replenish the 50AH used overnight the next sunny day with solar power – we can size the panels accordingly in Watt Hours or Wh.
50AH x 12V = 600Wh. So, we would need a minimum of a 200W panel operating in 3 hours of good sunlight to replenish our 50AH of used battery power.
Alternatively 2 x 100W panels. As the weather or panels are never 100% efficient it’s a good idea to double the amount of generation you calculated you needed or more. Panels are more affordable than ever – we recommend to put as many on your roof as your roof will fit.
We also recommend to double the battery capacity to give you a day off backup power in bad weather, if you can afford it.
We commonly supply 2 x 330W panels connected to 2 x 260AH batteries to suit New Zealand weather conditions and in some cases where customers are travelling in large motorhomes around the South Island in mid-winter 800W of solar eg 2 x 440W panels (or more).
The price differential between panel sizes is now minimal. For example – a 330W panel is only $41 less than a 410W panel.
The main consideration with panels is obviously their physical size, weight and what you can fit where on your roof to maximise your potential solar generation.
Modern large panels are split into two separate panels in the same frame which is valuable if one half panel is shaded by a tree for example, the other panel will provide half the total power.
Panels can be connected in series, in parallel or a combination using MC-4 branch and Y-connectors back to the controller(s).
Where you have limited roof space on a van or between the hatches and vents on a boat, you should choose the largest panel(s) that will fit the available space.
Mounting Solar Panels
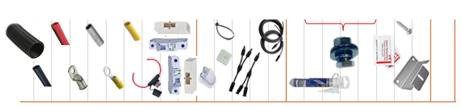
We offer many mounting options. The most popular are our panel kitsets which come in a range of sizes to suit small and large panels. These kitsets include the necessary MC4 cables, mounting brackets, self-tapping screws and bolts, fuse holders, cable connectors, heat shrink, marine grade sealant, cable clips and full instructions.
We also supply standard Z brackets with fixing hardware and a range of adjustable brackets which are ideal for mounting panels onto curved spaces such as boats which have curved decks and roofs.
In all instances we recommend using both a good marine grade adhesive/ sealant such as SIKA 291 with self-tapping stainless screws or bolts.
Sizing and Choosing Solar Controllers
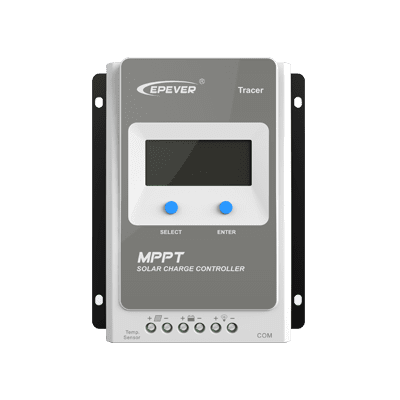
Solar controllers convert DC power voltages and currents from solar panels into the appropriate battery charging voltages and currents for a range of different battery types.
Batteries of different types require different charging regimes to charge them to the correct levels. An AGM battery, for example may require several stages of intelligent pulse charging whereas a Lithium may require a bulk charge at a fixed voltage.
The solar controller is programmed for the specific battery type and come in two types (PWM or MPPT). MPPT are the most modern and efficient systems. We don’t recommend PWM.
Solar controllers come in a range of sizes which are determined by the total input wattage of your panels. For example – a 10A controller in a 12V system will support a maximum of 130W or a single 100W panel or two 50W panels connected in series.
A typical RV or camper with a 12V system and has 2 x 330W panels (660W) would require a 60A controller rated to 750W of panel input power, for example.
Some large solar systems have dual controllers (one for each panel or string of panels) so if one controller fails, the other can deliver half the solar power to the battery bank if you wanted extra redundancy in your system – two smaller controllers is not a lot more expensive than a single large controller.
Solar panels should be installed with a maximum of 3 panels in a string (3 panels connected in series) to not overload the controllers.
Solar Controller Brands, Types, & Accessories
Solar charge controller models vary with regard to maximum input power (total panel wattage) and the type of system size, eg 12V, 24V, 48V. (eg Tracer AN series)
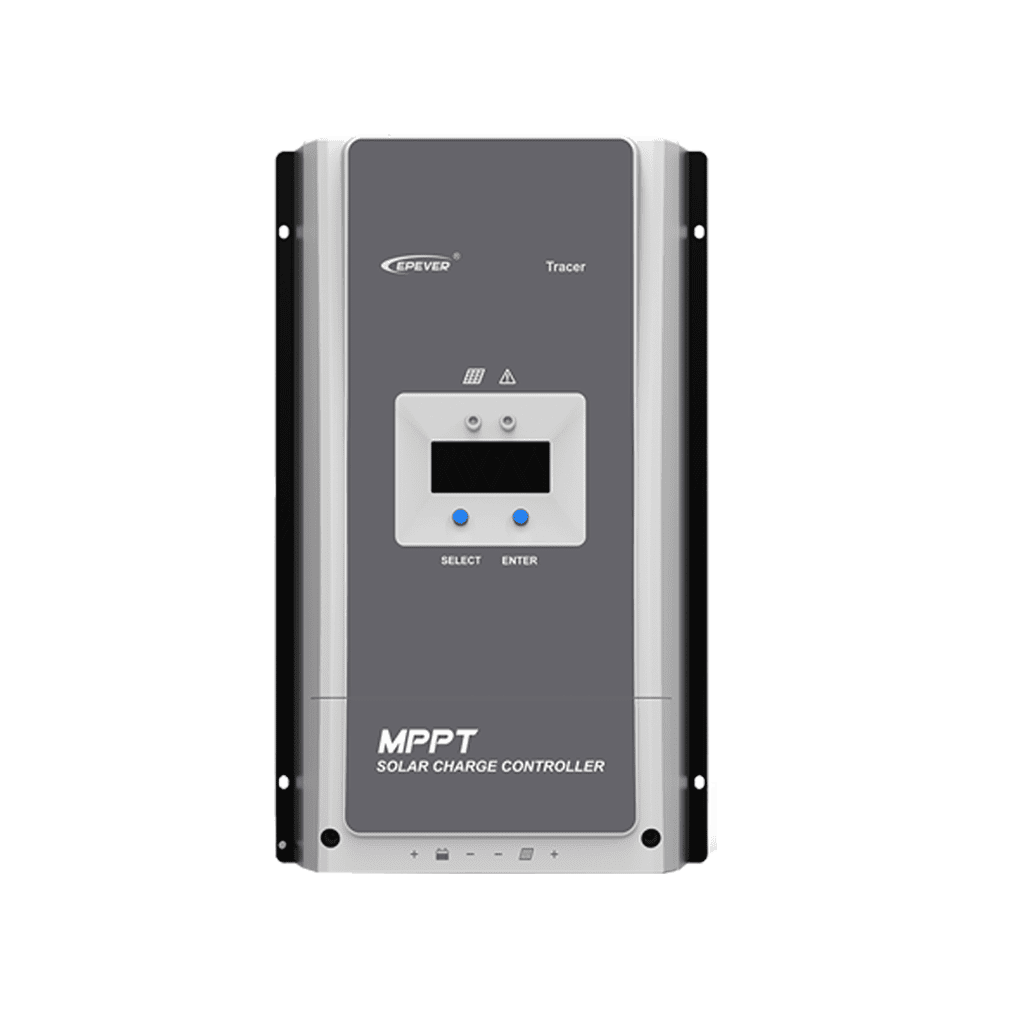
EPEVER Tracer AN Series (our most popular controller).
Some models provide independent charging of dual battery systems that have a house battery and start battery (eg DuoRacer)
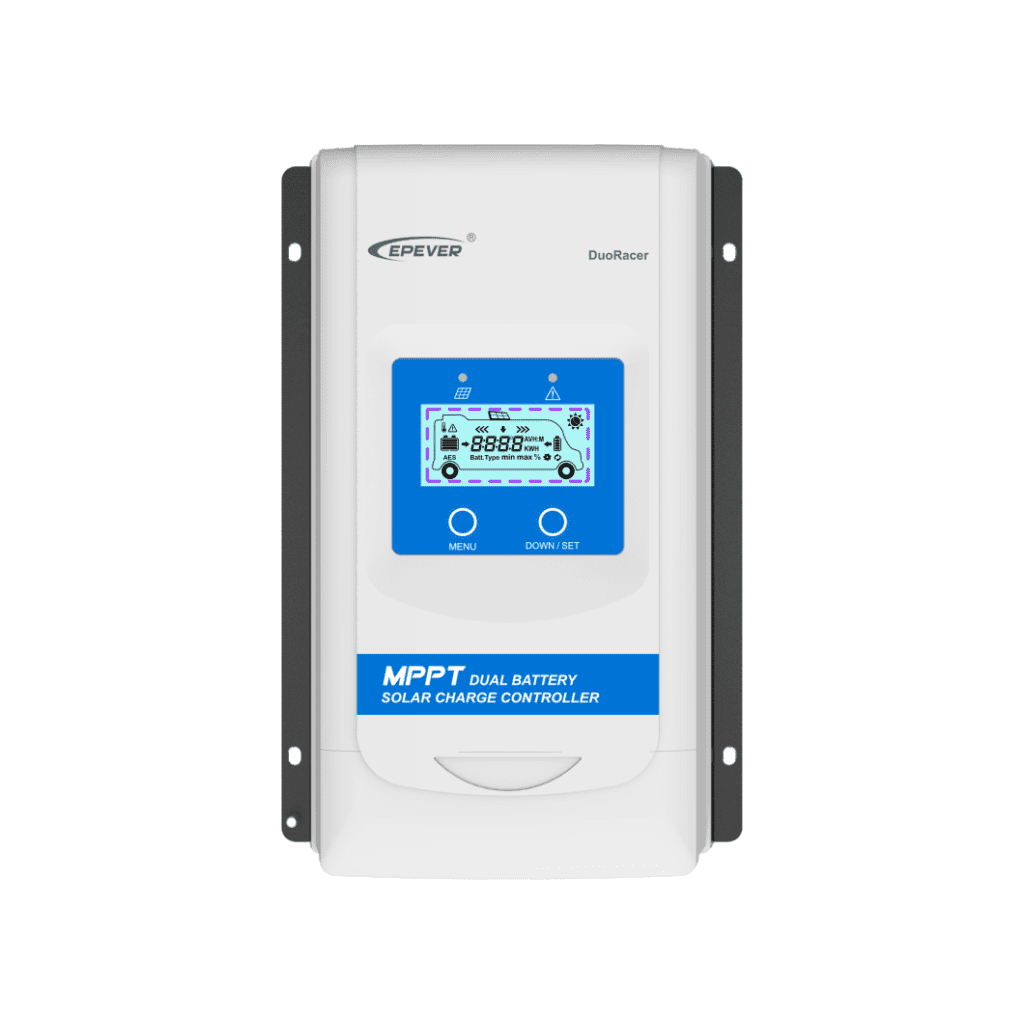
EPEVER DuoRacer Series
Some models are IP33 splashproof (eg XTRA range)
EPEVER XTRA Series
Some models are also waterproof (eg TRACER 2606BP).
Some models are shielded in metal cases for low noise and electrical interference (Eg Tracer BN Series)
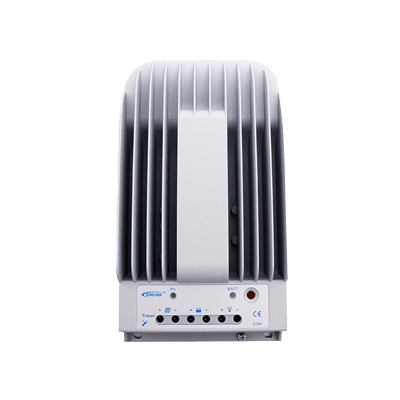
EPEVER Tracer BN Series
Some models have very high input power ratings for large solar arrays (eg Studer range).
External meters such at the Epever MT-50 allows easy view of a larger display and easier programming with more buttons and can be installed several metres from the controller it is connected to. So, you could mount your controller next to batteries under a bed for example and interact with the controller from a panel at the other end of your vehicle.
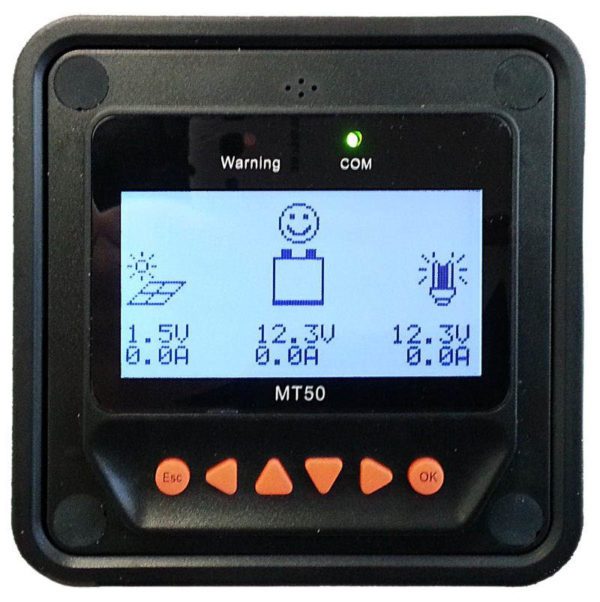
EPEVER MT-50 External Meter
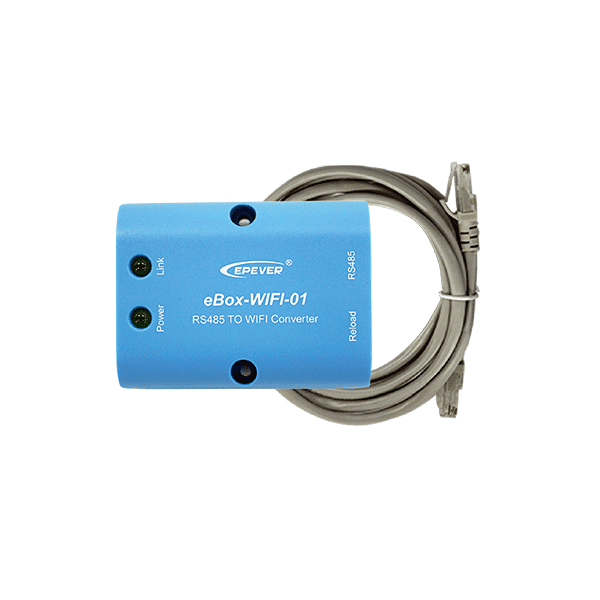
Bluetooth interfaces such as the eBox-BLE allow you to program and monitor your controller from your Smartphone via Bluetooth.
Sizing and Choosing Inverters to run AC Loads
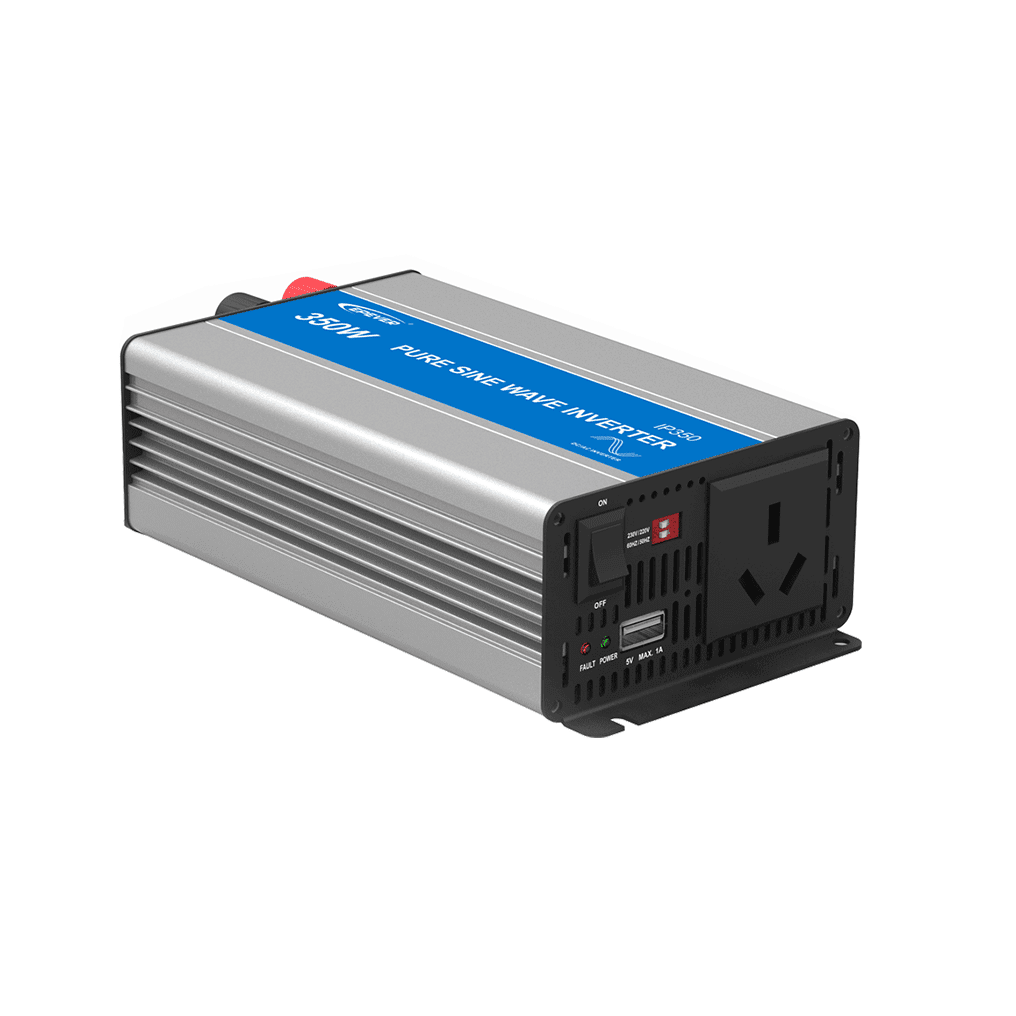
EPEVER IP-Series Inverter Range
To power AC loads, an inverter can be installed to convert 12V DC or 24V DC to 230V AC.
The most important consideration when choosing an inverter is to ensure that your battery bank will support the load.
In a camper or RV an inverter of 350W – 500W is quite suitable for light AC loads such as a laptop charger (65W-100W) or phone chargers (45W) or even small power rechargeable power tools.
A load of 200W at 12V is 24A which can be sustained by a couple of large AGM batteries for a few hours after dark. It’s a great idea to recharge any AC devices during the day so you can harness your solar power and save your battery power for the lowest loads after dark.
Many customers simply assume that larger loads will work with the battery systems that they have by simply adding an inverter to the system. This is a mistake. A system should generally be designed from the ground up around the inverter.
If for example you wanted to charge 2 e-bikes for 6 hours, you would consume a whopping 450AH.
Here’s that power formula again…
450W charger / 12V = 37.5A x 2 bikes x 6 hours = 450AH!
At 20% DOD you would need 2,200AH of available battery. This would also likely be a 24V or 48V system with enough battery power in parallel to deliver enough current from 10 large AGM batteries.
Put another way – if you connected a 2000W electric kettle to a 2000W inverter in a 12V system, this would draw a whopping 166A which may likely overload/ damage the inverter, overstrain the batteries and likely cook wiring, blow fuses or trip circuit breakers in a system that is not designed to handle that amount of load.
Inverters designed for large AC loads like appliances in houses (washing machines, ovens, kettles, toasters, microwaves etc) are generally connected to large battery arrays and are 48V systems and may have 8, 16, 32 or more deep cycle batteries or multiple large lithium batteries which make this application physically impossible and uneconomical in a van, RV, caravan or boat.
Other AC loads that have large inductive currents can also quickly overload or damage a system. For example, a 3-way fridge plugged into an inverter has a massive inductive startup load when the compressor motor starts up. This continuous start up current draw will quickly render a house battery flat or damaged.
In an RV, Camper, Van or boat we would always recommend gas for cooking, kettle and hot water. 12 or 24V DC for lighting and RV style appliances such as TV’s, compressor fridge/ freezers, stereos and a SMALL 350-500W inverter for low current AC loads such as a laptop, broadband router or phone charger.
No coffee machines, no kettles, no toasters, no microwave ovens 😊